


Hello, Welcome to Chatbot built with ease with Power Virtual Agents
Let’s say you want to build a chatbot that anyone can interact with, ask questions such as name, address, email, etc. and answer customer’s FAQ, make decisions and more, but you can’t build it because you have no knowledge of any programming language.
Well, you’re in the right place. With Microsoft Power Virtual Agents, you can build a Chatbot with Low/No code, isn’t that amazing?

For today, we will build a simple and fun chatbot that will ask for Nickname, Country, Current mood, and suggest healthy tips to brighten your mood.
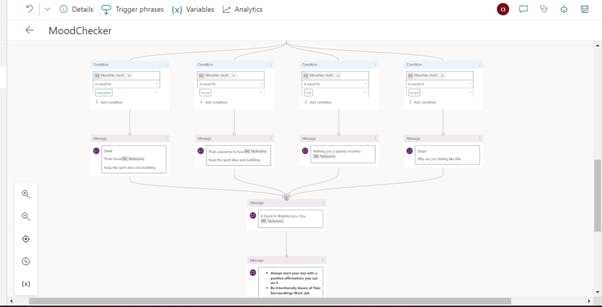
Our flow will look like this

So, First what is Power Virtual Agent?
Power Virtual Agent is part of the Power Platform App. It is a No code/Low code app which can be used to build and automate seamless applications.
Power Virtual Agents are adaptable Artificial Intelligence (AI) chatbots, at your service. They can solve common customer and internal-facing issues automatically, freeing up staff to focus on complex requests and high-value interactions. One can easily build a chatbot without the need of a developer, expert, or data scientist.
Additionally, with power virtual agents, you can empower your team by reducing their workflow, reducing costs by automating tasks and increasing customer satisfaction.
The Power Virtual Agents is not limited to any industry, profession, or department. Everyone and anyone can use it.
*Ready to build your own chatbot? *
Sign into your M365 account
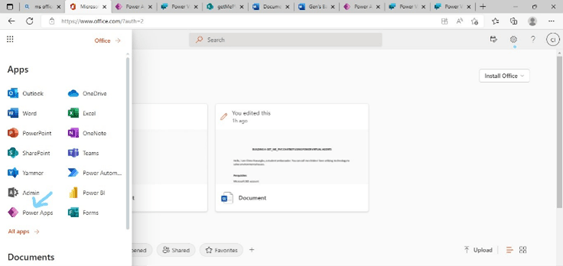
• Create an M365 Developer account or sign in to use Microsoft365
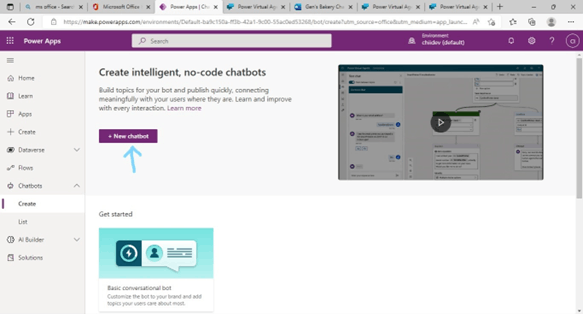
• You can either click directly on Power Apps or All Apps to expand and select power Apps.
• Create or Sign in to Power Apps by using your organizational account.
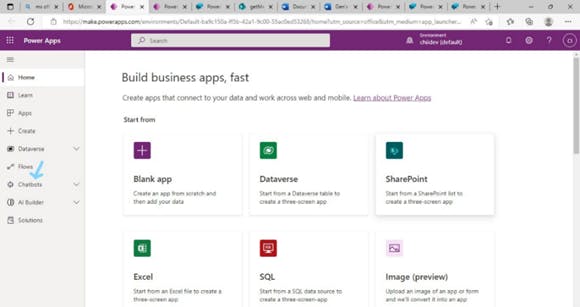
• On the left side pane, Select the Chatbots Dropdown and Select **Create **
• Select New Chatbot
Alternatively, you can go to the Power Virtual Agent website directly and skip the above method
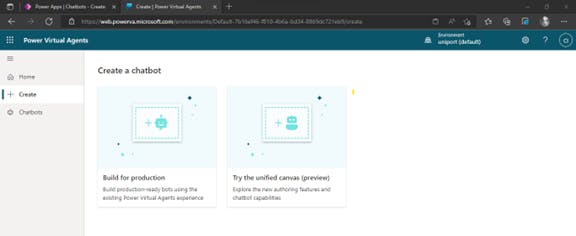
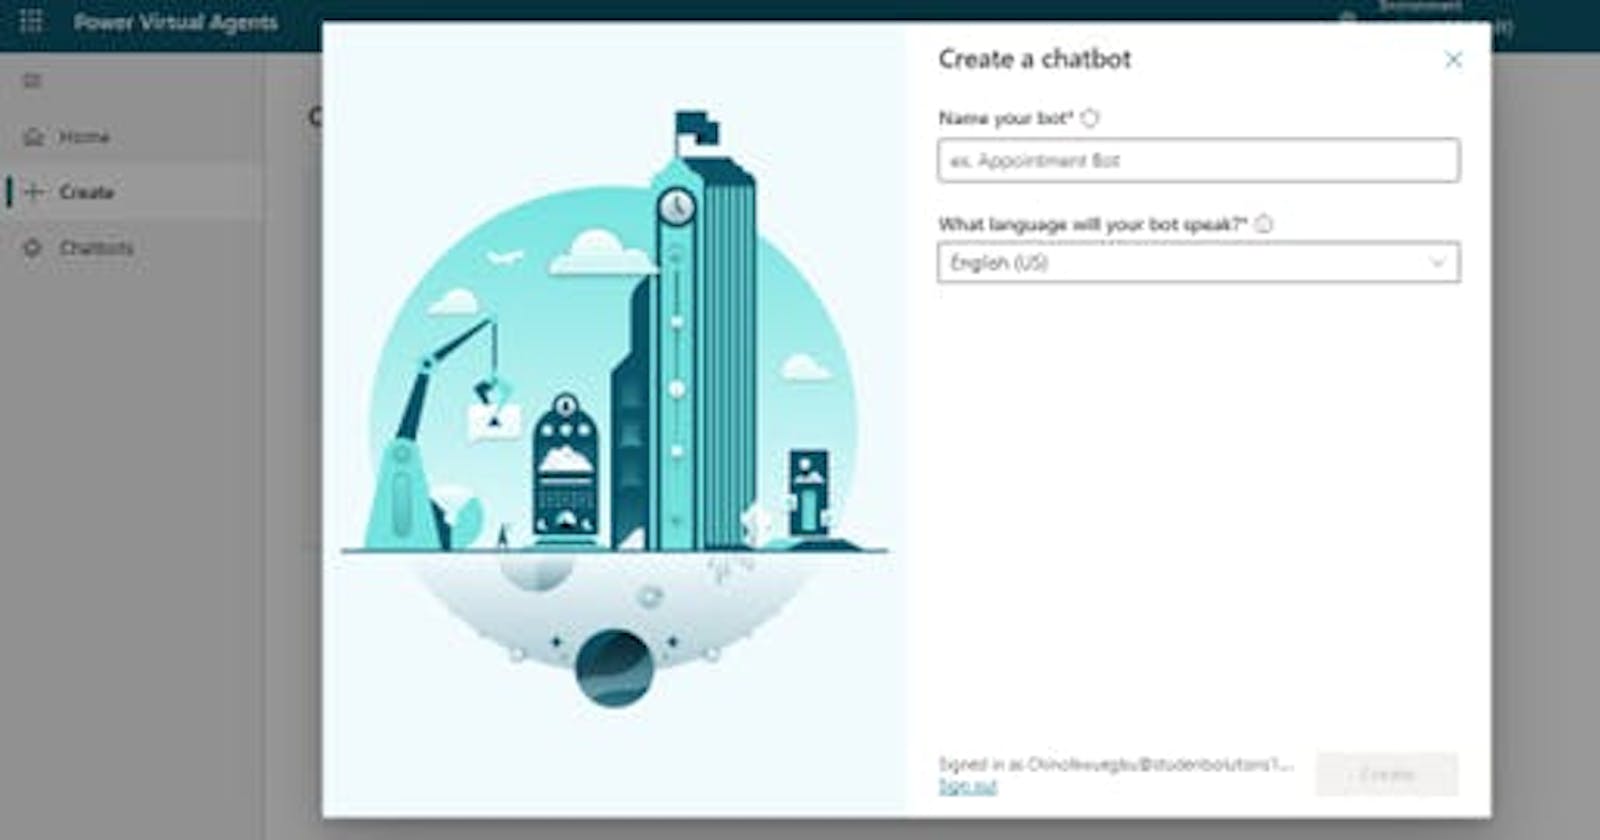
• On the Left side Pane select **Create **and select Build For Production
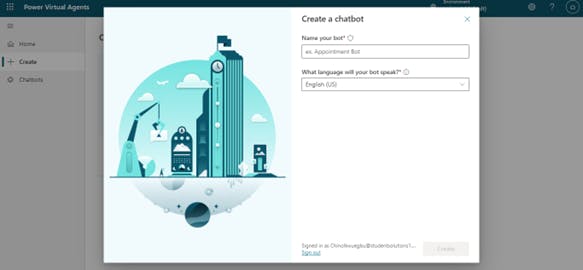
• Name your Bot; I will name mine Mood Lifting Bot and choose the language your bot will speak
Get Familiar with your Environment
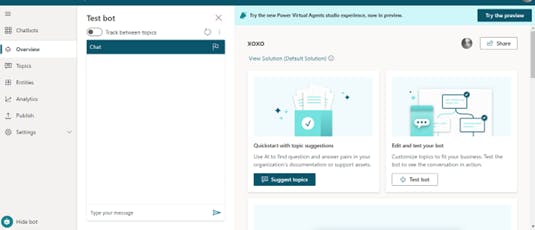
On the left Pane, you will see
Overview: This is the home page of your bot, it shows suggest topic, test bot, share and publish. It also shows link to join the community, watch videos and learn more.
Topic: This is what starts the conversation. You can create trigger phrases that you think your customers are likely to use when interacting with your bot and get a response. You can either select an existing topic, new topic or suggest a topic.
Entities: In Power Virtual Agents, there are prebuilt entities which you can use to identify and group information such as age, colors, numbers, email. These help the bot to pick out conversations. You can also create new entities as well but ensure you check properly before creating a new one.
Analytics: You can utilize this tool to analyze your bot activities, such as summary, engagement rate, customer satisfaction and checking the word customers use to trigger a conversation and improve your bot. Use this tool to improve your bot’s performance.
Publish: Excited to get others try out your bot? You can either set up channels, integrate the bot with your website or share the link directly to your Facebook, twitter or use the demo website.
Settings: Here, you can view, add security & AI capabilities, update and make changes to your bot and more.
***Now we are familiar with our environment, let's start our conversation with the bot ***
**Greetings (Conversation Starter) **
What is the first thing you say to a bot? 🤔
We know the first thing that comes up when interacting with a bot is a Greeting message, so let’s go ahead and edit that.
As the saying goes “First Impression Matters!"
• On the left side pane, Select Topic, and Select **Greeting **
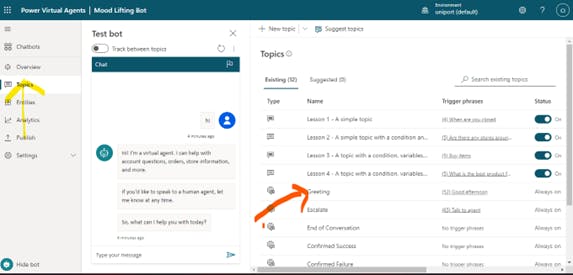
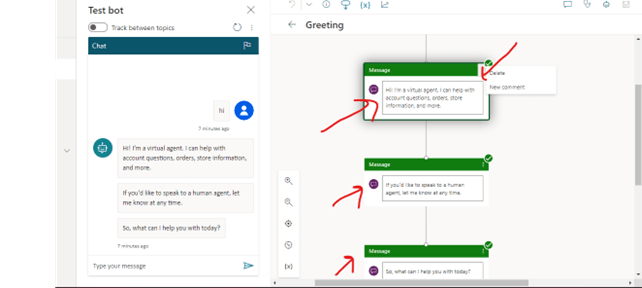
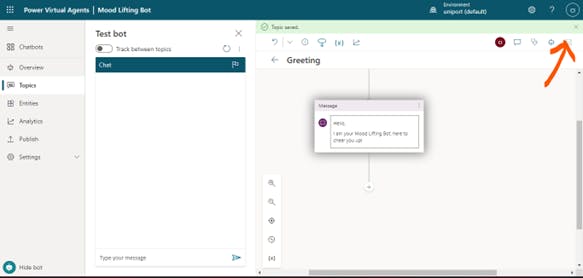
• Let's edit the message we want our bot to say
• You can delete the message box using the 3 horizontal dot at the top right
• Always Save your work for every change you make, to ensure that you are testing the recent change you made to the bot
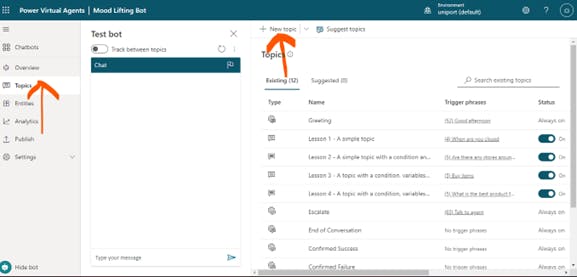
Let’s go ahead and create a new Topic, so we can redirect from the Greeting Topic to the new one
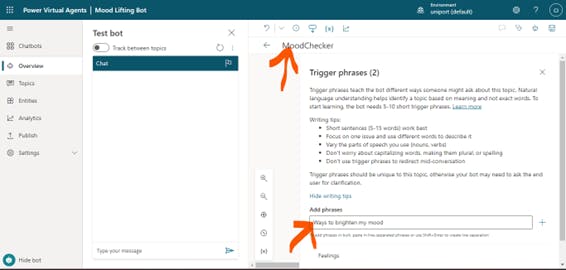
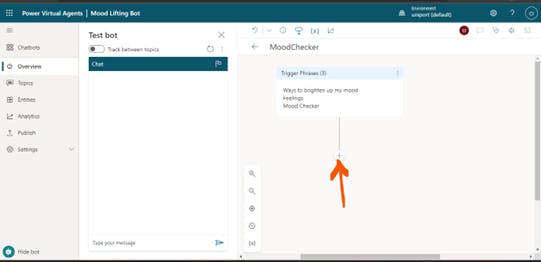
• On the left side pane, Select Topic, Select New topic, Rename your topic, and** Add Phrases** that you think may trigger this Topic such as words, sentences, noun, or verb • Close the trigger phrase

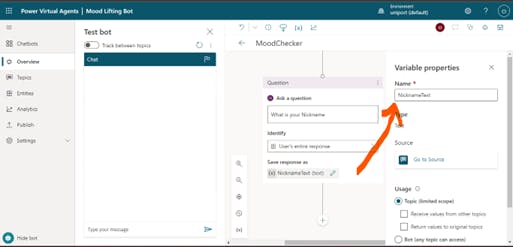
• Click on the "+"node and select Ask a Question

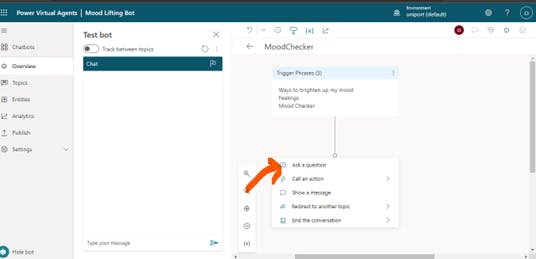
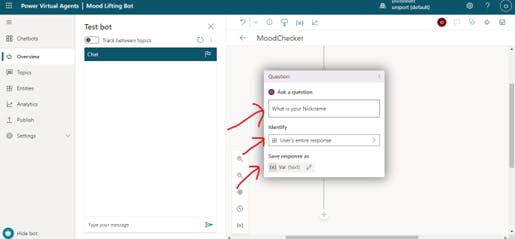
• Ask your first question
• For identify, choose what you want the bot to Identify the info with it. Let’s say the question is asking about the age of a person, so you’ll choose the Age entity.
• Replace the (var) with your choice of name, that you want that field to be identified with
• Go ahead and save the changes
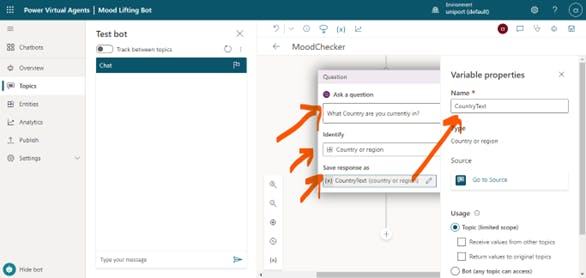
• Click on the "+" node again and select **Ask a Question **
• Now let’s ask the second question
Our next question will have options and conditions, so if a user select an option, the condition attached to it will be executed.
• Click on the "+" node, select Ask the question and input your question
• For the identifier, choose Multiple Choice Options
• Add the **Options **for the users
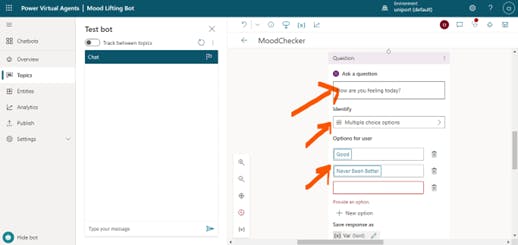
• For every Option added, a condition is attached to it.
Let’s say a user select his “Current Feeling” as “Good”, we want to display a message that shows “Awesome, we are glad you are having a good day”.
• Click on the **"+"node **and select Show a message
• Go ahead, add a message and do the same for the rest
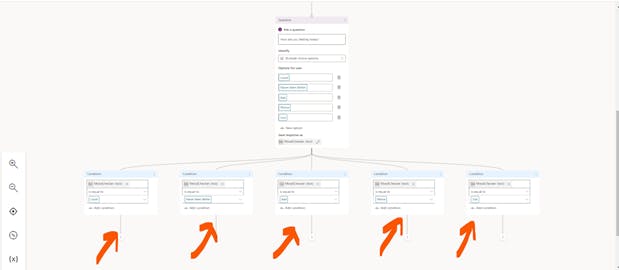
When you’re done, it is going to look like the image below.
• To link one node to another, click on the node, when you see a blue like circle, hold it then connect it to the desired step or message
• Save your recent update
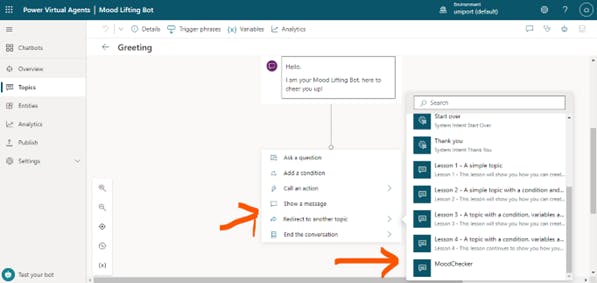
Let's go back to the Greeting Topic
• Click the **"+"node **and select Redirect to another topic
• Choose the **topic **and save the recent development
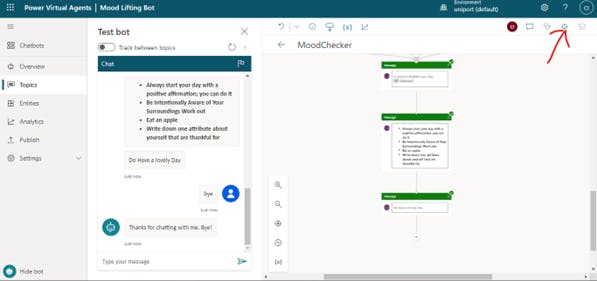
• Now let’s test our bot
• Click on the robot icon at the top right
• Go ahead and type a message to start the conversation
• Great! Our Bot is working
Our next step is to publish our Bot so others can use and interact with it
• On the left side pane select the Publish Tab and select Publish
• It will take few seconds to build, once it is done, you will see a message at the top
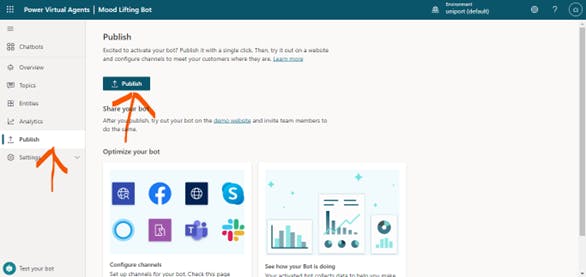
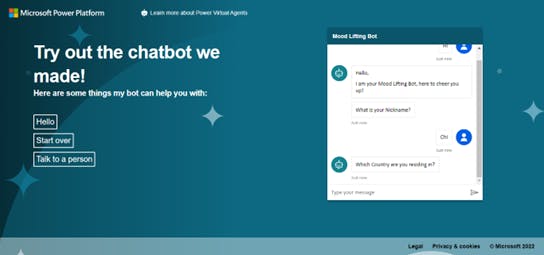
• To try out your chatbot, click on the Demo Website, you will be redirected to a new page on your browser. You can share the link with your friends to test it out.
This is the demo website where you can test your bot for errors and flows.
Summary
In this blog you learned:
• The capabilities of the Power Virtual Agent
• How to create a simple Chatbot
• Create a new topic
• Use Prebuilt entities
• How to publish your Bot
References
Fundamentals - Publish a chatbot to various channels (contains video) - Power Virtual Agents | Microsoft Learn
Introduction to Power Virtual Agents - Training | Microsoft Learn